This post may contain affiliate links. Please read our disclosure policy.
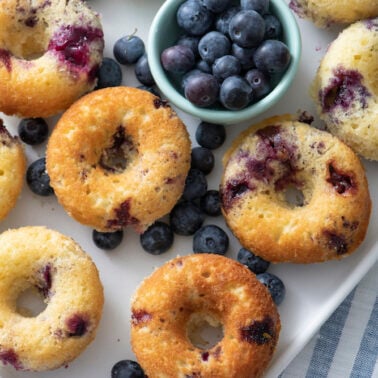
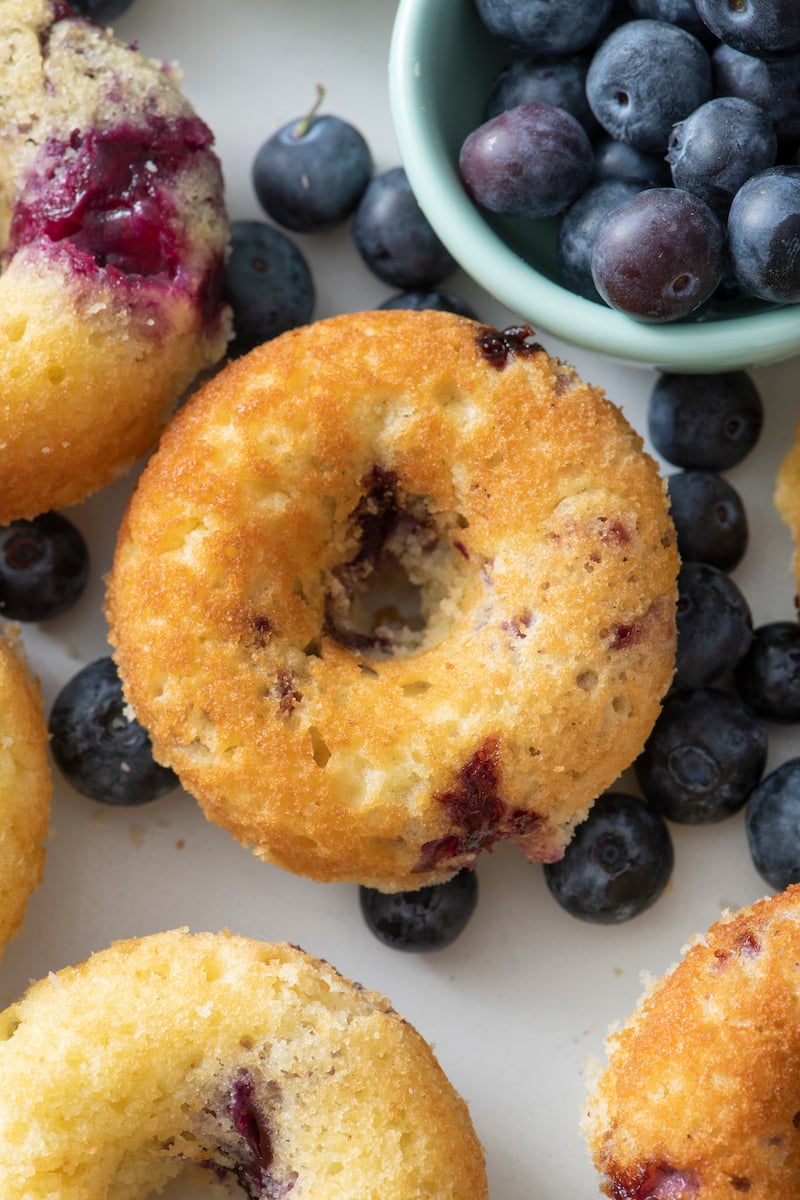
These Baked Blueberry Doughnuts are a doughnut (and berry!) lovers dream come true! Soft, fluffy, and bursting with juicy berries, they’re the perfect sweet treat for breakfast, brunch, or anytime you need a little pick-me-up. There’s just something about homemade doughnuts that feels like a warm hug!
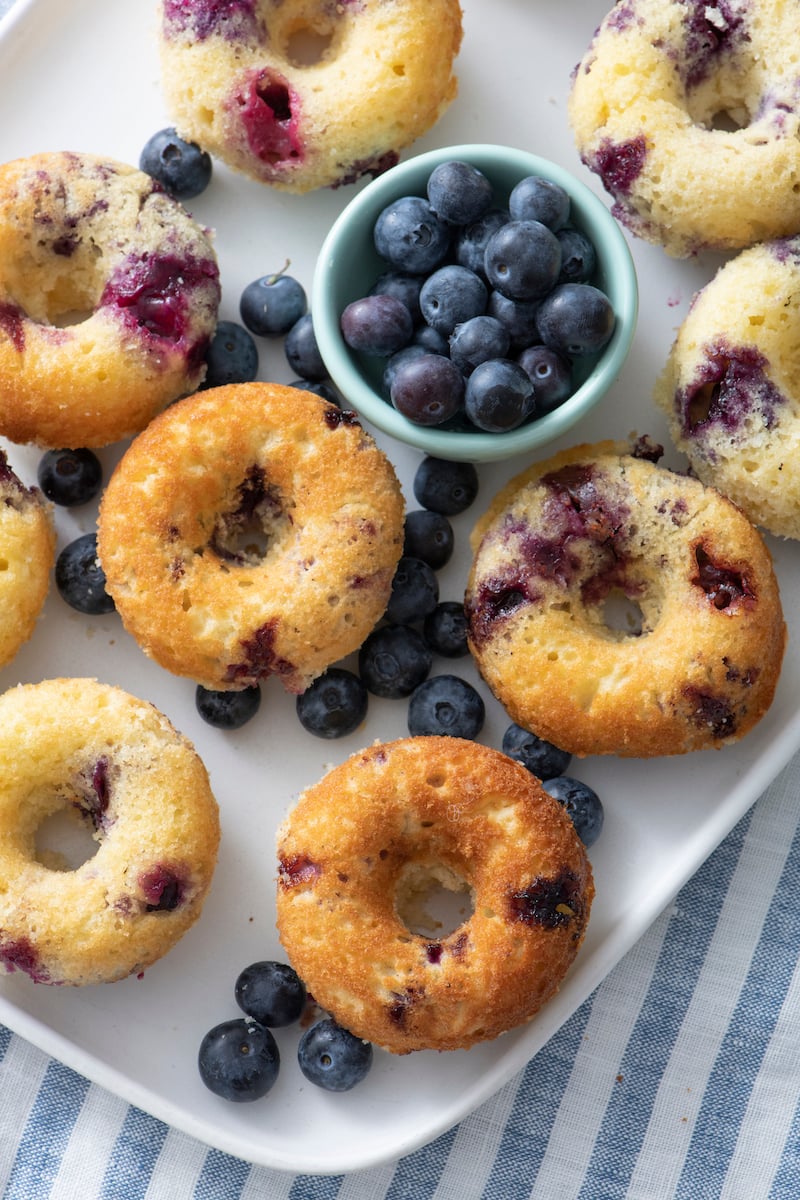
Table of Contents
Why I Love This Recipe
These baked blueberry doughnuts are one of my favorite low-effort, high-reward treats to make when berries are abundant at the farmers’ market. They’re baked, not fried, so they feel a little lighter but are still super satisfying. They’re ready in about 15 minutes, and the batter comes together fast with basic pantry staples. If you don’t have a doughnut pan, no worries—you can totally make them as muffins!
I love how they’re loaded with juicy blueberries, especially when I’ve got extras from making my Blueberry Chia Smoothie or Blueberry Cream Cheese French Toast. You can also switch them up with different berries or go wild with a glaze. If you’re doughnut obsessed like my family, definitely check out my Air Fryer Donuts or Crumb Cake Donuts too!
The Ingredients
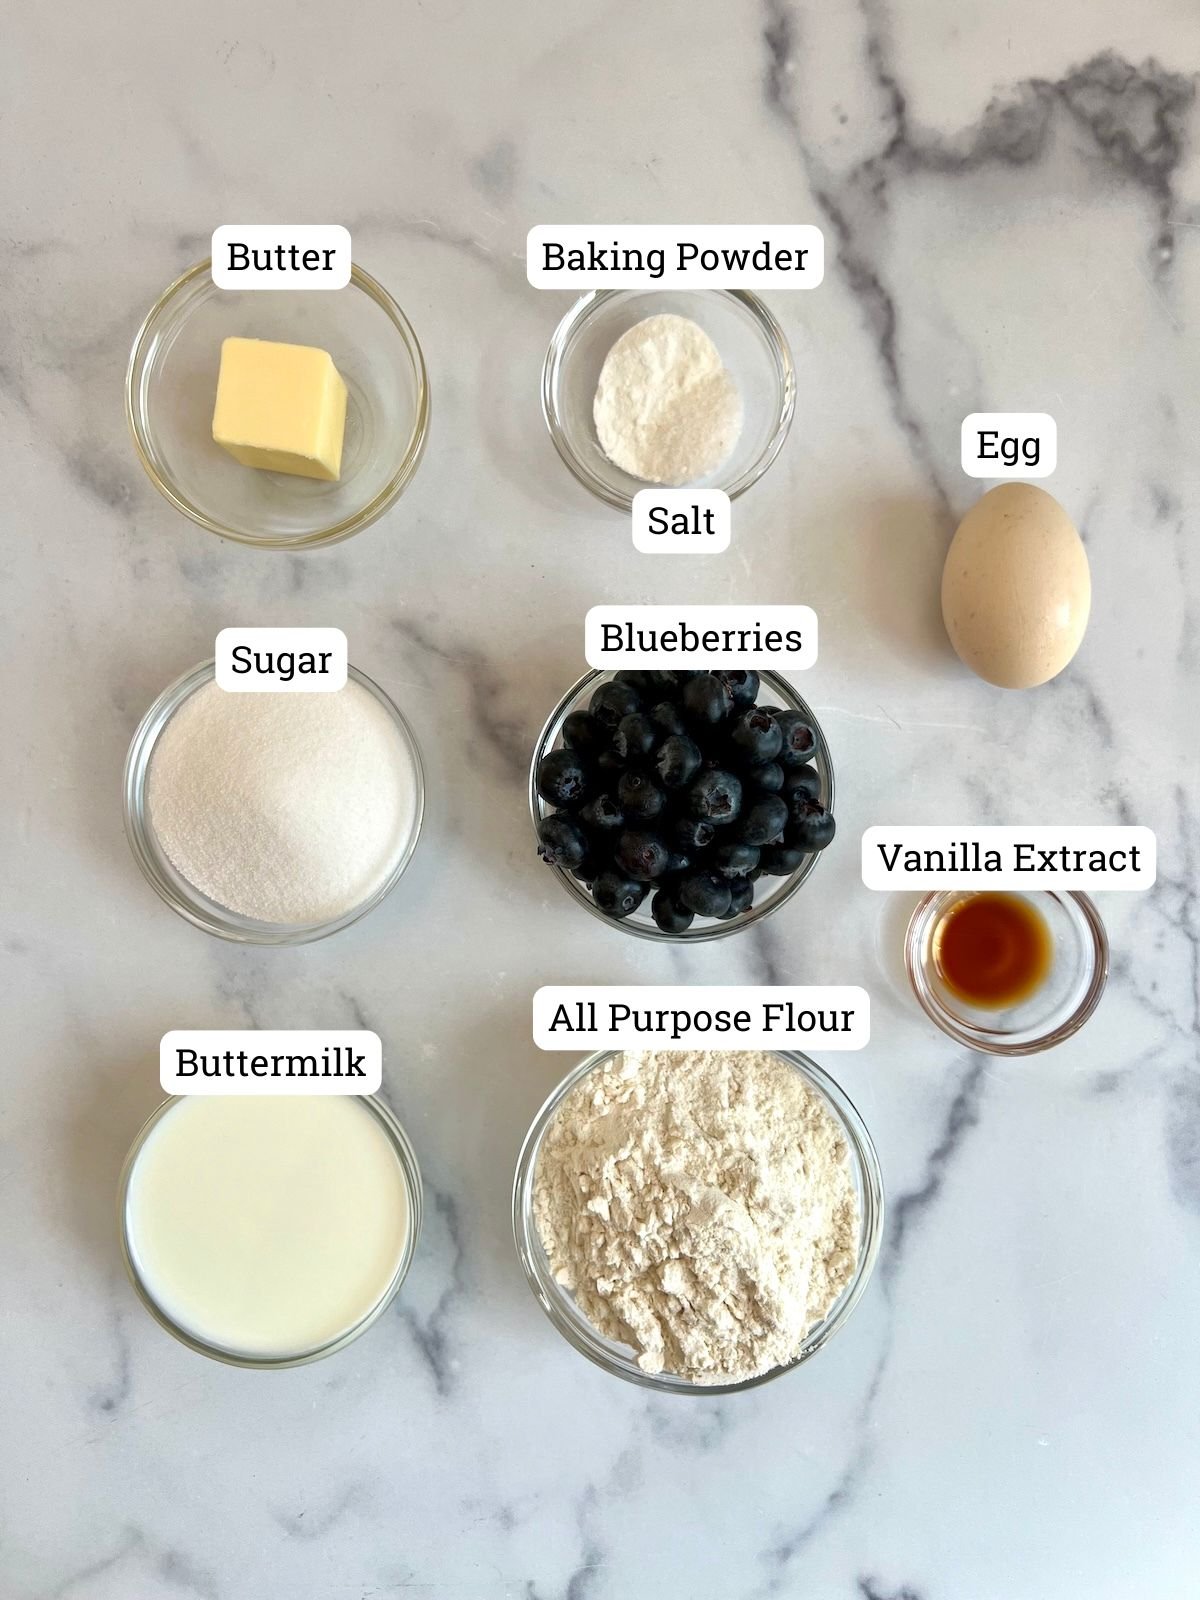
- All-purpose flour: The base of the doughnuts, providing structure without being too heavy. For best results, measure by spooning the flour into the cup and leveling it off.
- Baking powder: This helps the doughnuts rise and gives them a light, cakey texture.
- Unsalted butter: Adds moisture and richness. Softened butter mixes more easily, resulting in a tender crumb.
- Granulated sugar: Sweetens and contributes to the doughnuts’ structure and browning.
- Large egg: Binds the ingredients together and gives the doughnuts a soft, cake-like texture.
- Buttermilk: Adds tenderness and a slight tang that complements the blueberries. If you don’t have buttermilk, you can easily substitute with milk and vinegar mixture. More detailed measurements below.
- Vanilla extract: Adds warmth and depth to the flavor.
- Fresh blueberries: Fresh berries add juicy pops of flavor. If using frozen, don’t thaw them to prevent a streaky batter.
- Powdered sugar (for dusting): This is totally optional, but adds a sweet finishing touch.
*See the recipe card below for a full list of ingredients*
Variations and Substitutions
- No buttermilk? Use regular milk, or make your own by mixing 1/2 tablespoon of vinegar or lemon juice into 1/2 cup of milk. Let it sit for 5 minutes before using in your batter..
- Need an egg-free version? Use a flax egg (1 tablespoon ground flaxseed + 3 tablespoons water, mixed and rested) for a egg-free swap.
- Different berries: Try raspberries, blackberries, chopped strawberries, or even a mix! Speaking of berries… want more? Try my Raspberry Pancakes, Strawberry Muffins or Banana Berry Bread!
- Glaze it up: Instead of powdered sugar, drizzle with a quick glaze made 1 cup powdered sugar, 2-3 tablespoons of milk (depending on how thick you want the glaze) and a dash of vanilla extract. Dip the tops of the doughnuts into the glaze and people will be hard pressed to decide if these are homemade or from your local doughnut shop!
- No doughnut pan? These work great as muffins—just bake in a greased or lined muffin tin at 375°F for 18–20 minutes!
How to Make Baked Blueberry Doughnuts
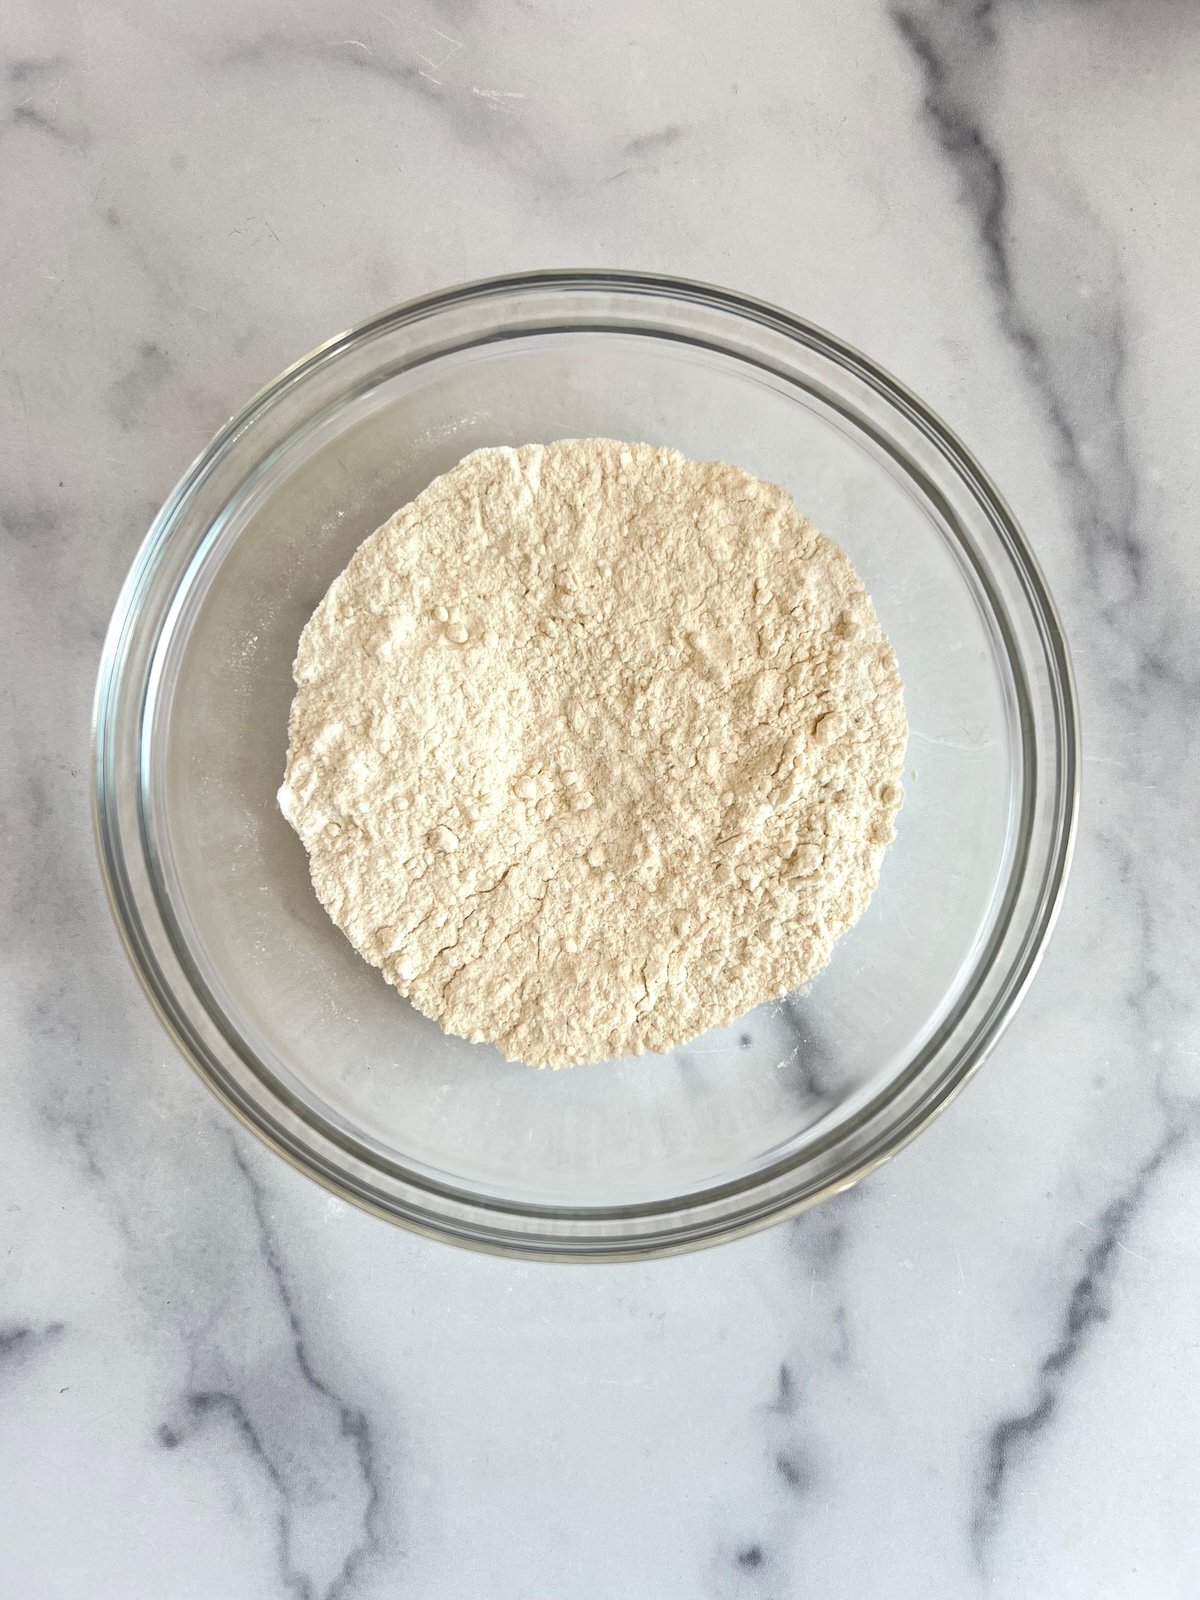
Step 1: Preheat oven to 375° F. In a bowl, whisk together the flour, baking powder, and salt and set aside.

Step 2: In a standing mixer (or bowl using a hand mixer), cream together the butter and sugar.

Step 3: Add the egg, buttermilk and vanilla and combine.

Step 4: Add the flour mixture to the butter/sugar mixture and mix until just combined.

Step 5: Gently fold in the blueberries.

Step 6: Spoon into greased and floured donut pan, filling ¾ full.

Step 7: Bake for 14 minutes, or until the tops spring back when lightly pressed. Cool and lightly dust with powdered sugar if desired.
Tips and Tricks
- Toss blueberries in flour before folding them in to keep them from sinking to the bottom.
- Don’t overmix the batter—it keeps the doughnuts tender.
- Use a piping bag or zip-top bag with the corner cut out to neatly fill your doughnut pan.
- Check doneness by lightly pressing the tops—they should spring back.
- Let them cool fully before glazing or dusting so it sticks nicely.
FAQs
Yes! They’re great for freezing! I freeze them in a single layer for about 30 minutes, then transfer to a labeled freezer bag, and keep them for up to 4 months. When ready to enjoy, just pop them in the toaster oven until they’re heated through.
You could use frozen berries. Keep them frozen when you mix them, and very gently fold them into the batter to avoid bleeding!
Store in an airtight container at room temperature for up to 2 days. After that, I recommend freezing them for longer storage.
More Berry Recipes to Try
Make a batch of these Baked Blueberry Doughnuts soon! They’re the perfect breakfast treat to enjoy with your morning cup of coffee or for the kids to have as an after school (or after summer camp) snack! I’d love to know what you think — leave a comment and rating below!
Want more Weelicious? Subscribe to my newsletter and follow me on Instagram, Facebook, and TikTok for all the newest recipes!
Would you like to save this?

Baked Blueberry Doughnuts
Equipment
- donut pan
- hand mixer or stand up mixer
Ingredients
- 1 cup all purpose flour
- 1 teaspoon baking powder
- 1/2 teaspoon kosher salt
- 2 tablespoons unsalted butter, softened
- 1/2 cup granulated sugar
- 1 large egg
- 1/2 cup buttermilk
- 1 teaspoon vanilla extract
- 1 cup fresh blueberries
- powdered sugar, for dusting
Instructions
- Preheat oven to 375° F.
- In a bowl, whisk together the flour, baking powder, and salt and set aside.
- In a standing mixer (or bowl using a hand mixer), cream together the butter and sugar.
- Add the egg, buttermilk and vanilla and combine.
- Add the flour mixture to the butter/sugar mixture and mix until just combined.
- Gently fold in the blueberries.
- Spoon into greased and floured donut pan, filling ¾ full.
- Bake for 14 minutes, or until the tops spring back when lightly pressed.
- Cool and lightly dust with powdered sugar.
Notes
-
- Toss blueberries in flour before folding them in to keep them from sinking to the bottom.
- Don’t overmix the batter—it keeps the doughnuts tender.
- Use a piping bag or zip-top bag with the corner cut out to neatly fill your doughnut pan.
- Let them cool fully before glazing or dusting so it sticks nicely.
- Storage: In an airtight container at room temperature for up to 2 days. After that, I recommend freezing.
- To Freeze: Freeze them in a single layer for about 30 minutes, then transfer to a labeled freezer bag, and keep them for up to 4 months.
- No buttermilk? Use regular milk, or make your own by mixing 1/2 tablespoon of vinegar or lemon juice into 1/2 cup of milk. Let it sit for 5 minutes before using in your batter.
- Need an egg-free version? Use a flax egg (1 tablespoon ground flaxseed + 3 tablespoons water, mixed and rested) for a egg-free swap.
- No doughnut pan? These work great as muffins—just bake in a greased or lined muffin tin at 375°F for 18–20 minutes!


oh i would love a plate of these for breakfast right now!
These are right up my alley! Always looking for new ways to put my donut pan to use 🙂
I made these as muffins since I don’t have a donut pan. It took about 18 minutes and they are, no sorry, they WERE so good. They are already gone! I’m thinking of dropping a little chunk of cream cheese on each one next time before baking. Mmmmm
Blueberry donuts! What a great idea!
Reduce the salt by about half!
I do not have unsalted butter. What adjustment can I make in order to use regular butter? Just leave out the salt? Thanks!
I made these today and they are SUPER yummy and not too sweet. My son asked if we can put chocolate chips in them, so I doubled the recipe and split the mix in half. Half with fresh blueberries and half with chocolate chip. I used a Mini Doughnut Pan from Williams Sonoma and baked them for 8 minutes at 370. Perfect! I also used a Mini Muffin Tin and baked them for 12 minutes at 370 and they came out great. Definitely will make again. My 3.5 year old loved helping me. We made so much that I’m bringing them to his preschool for their snack tomorrow.
Any thoughts on doing these gluten free?
How did the dairy free version turn out? I have a dairy allergic little one as well.
This sounds great. I am going to try to make this dairy free with some substitutes. I love your recipes, but I’d love even more to see some dairy free recipes!
These are absolutely delightful, as is making them! My two and a half year old daughter and I had a blast whipping these up. Well done:)
I haven’t tried an egg replacer in this recipe, but I’ve heard that many people have success with a Flax Egg in baked goods. 1 tablespoon ground flax plus 3 tablespoons water = 1 large egg. Let the mixture sit for a few minutes before adding to the recipe.
These look great! Would I be able to leave out the egg (egg allergies). And what would you suggest as a replacement?
Thanks for sharing the recipe!
These look great, I can’t wait to try them!
Katherine btw I love all your recipes u are really good 🙂
My grandmother was an award winning baker and she taught me to use 1 Tbsp of vinegar or lemon juice to 2/3 cup of regular milk as a substitute for buttermilk. I tend to use vinegar in savoury recipes and lemon juice in sweet recipes.