This post may contain affiliate links. Please read our disclosure policy.
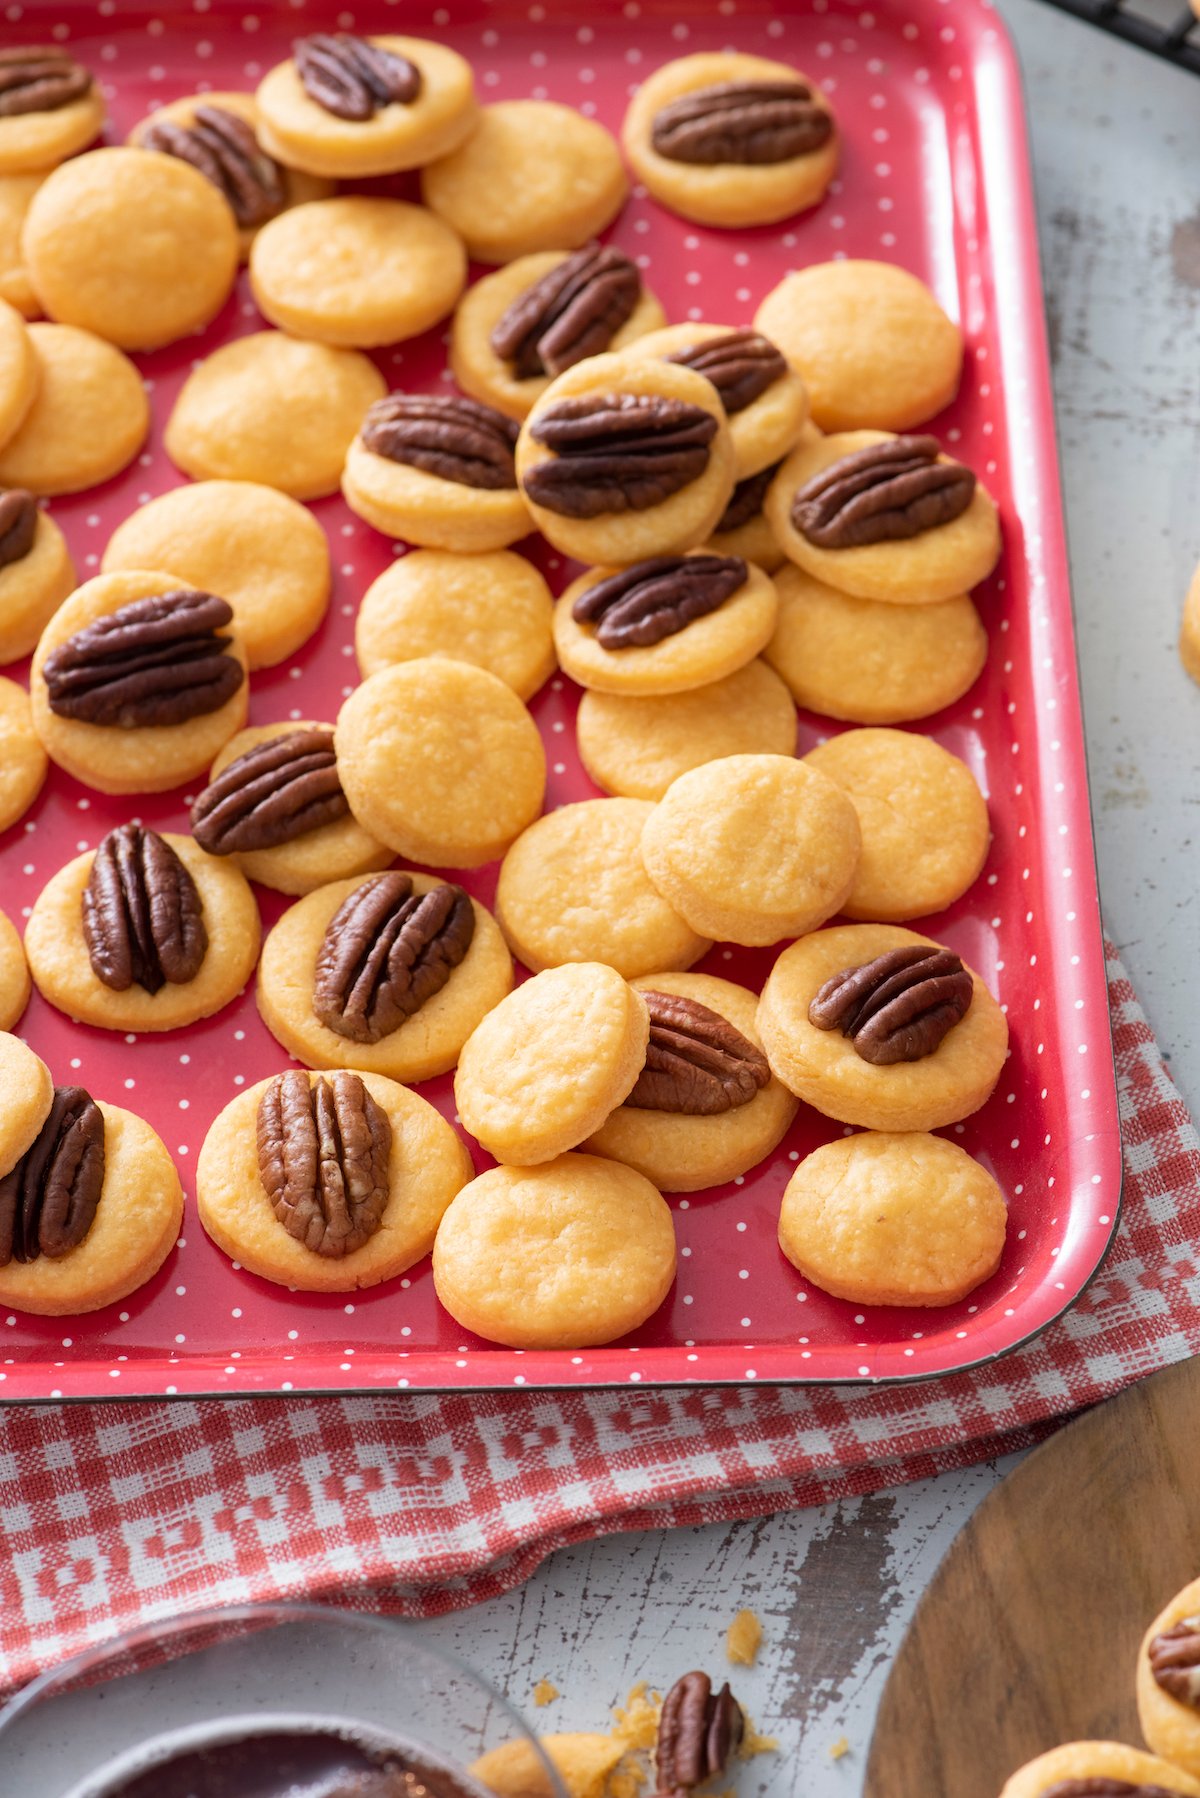
‘Tis the season for spreading joy and what better way than with a delightful homemade treat! If you’re a fan of the cheesy goodness reminiscent of Goldfish crackers, you’re in for a treat with these irresistible Cheese Wafers. And they’re only four ingredients! So simple.
Some moms make their kids sugar cookies, gingerbread people and or maybe even Peppermint Brookies. My mom made cheese wafers. I’m not talking about a tins worth, I’m literally talking pounds and pounds! You would have thought she was starting her own cheese wafer business with the amount of sharp cheddar cheese kept in our refrigerator, especially during the holidays. I remember standing by her salivating as she made them. Really, they’re THAT good.
Table of Contents
Why I Love This Recipe
- Perfect for Gifting: Not only do these Cheese Wafers capture the essence of a classic snack, but they also add a personal touch to your holiday gifting. Package them up in cute containers or festive bags, and you’ve got an edible holiday gift that’ll make anyone’s day.
- Super Kid-Approved: These wafers are not just kid-friendly; they’re kid-MAGNETS. My little ones can’t resist the cheesy allure. With the perfect blend of cheesy goodness and a hint of spice, they’re a snack that pleases all palates.
- Homemade Goodness: If you love the nostalgic flavor of goldfish crackers, then you’re going to be obsessed with these Cheese Wafers. They’re the perfect homemade version of everyone’s favorite childhood snack, and dare I say, may even outshine the original? Looking for more homemade snack classics? Try Homemade Graham Crackers and Homemade Oreo Cookies!
The Ingredients

- Sharp Cheddar Cheese: Please, do yourself a favor and shred your own cheese! You can teach kids to safely use a box grater.
- Butter: I like salted since I don’t add salt to the recipe.
- All Purpose Flour: Look for unbleached options at the store.
- Raw Pecan Halves: Don’t get salted/roasted nuts as they will overwhelm the cheese instead of pairing nicely.
Substitutions and Variations
- Nutty Choices: Not a fan of pecans? Swap them for your favorite nut or skip them entirely for a nut-free version—easy peasy!
- Gluten-Free? No Problem! Just use your go-to gluten-free flour, and you’ll still have those irresistible, cheesy wafers everyone can enjoy.
- Cheesy Fun: Try mixing things up with different cheeses like pepper jack or colby jack. It’s a simple way to give these wafers your own delicious twist!
How to Make Homemade Cheese Wafers
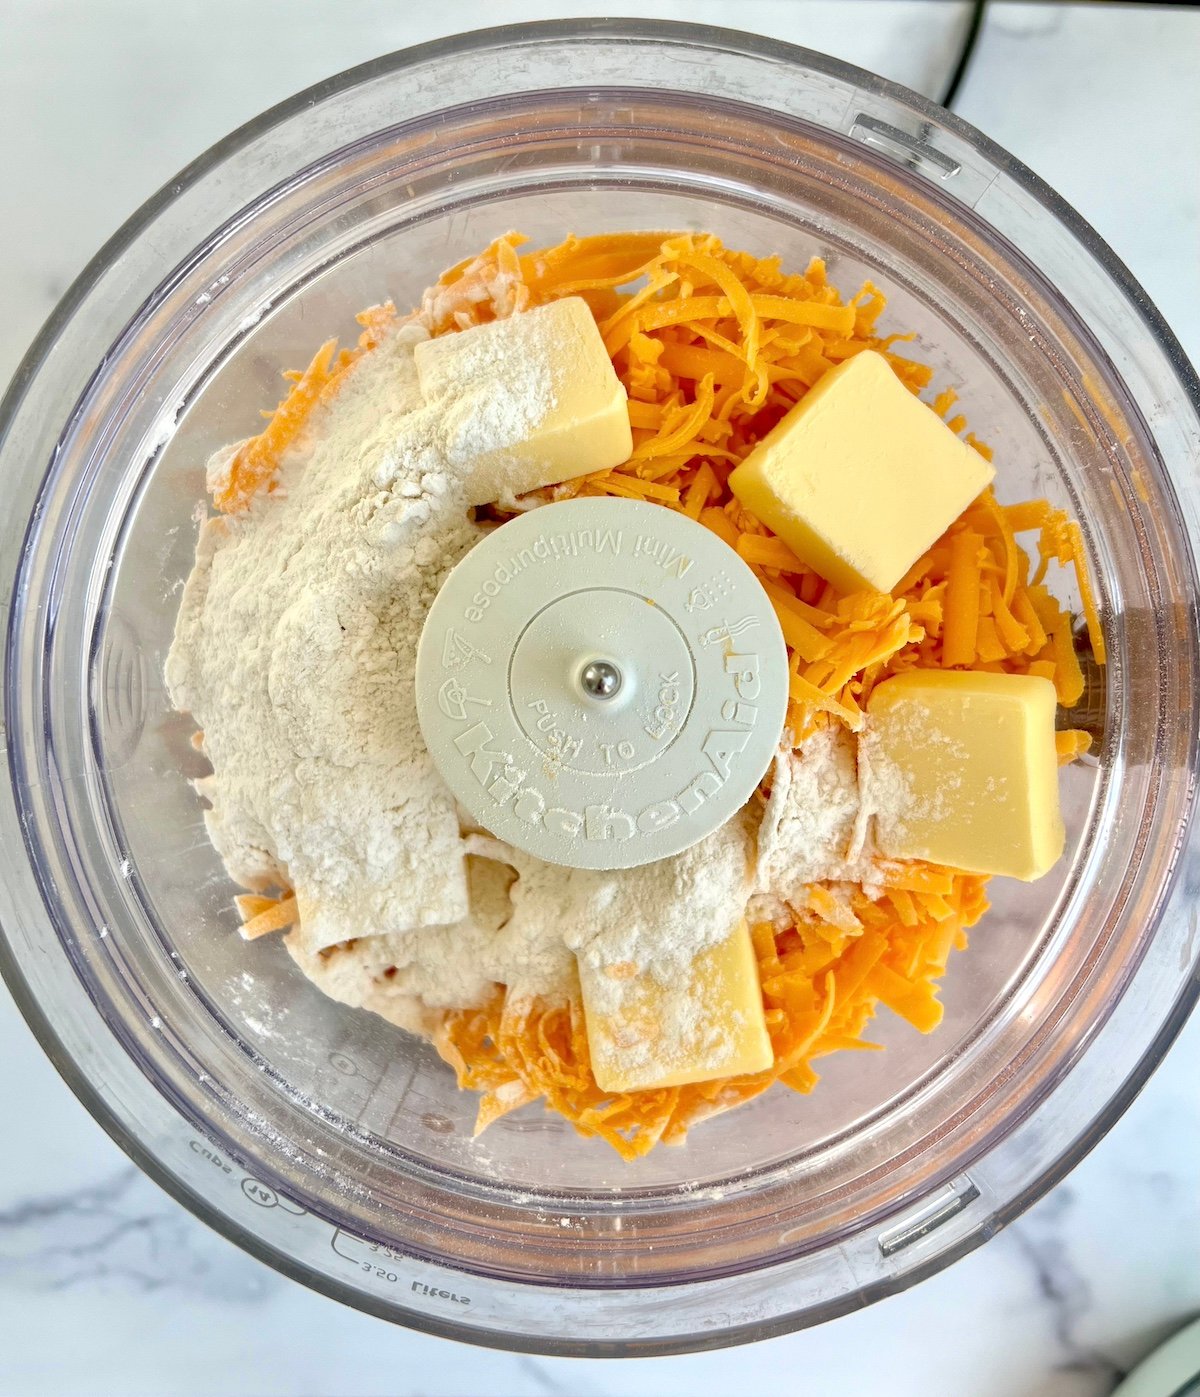
Step 1: Add cheese, flour and butter to the bowl of a food processor.
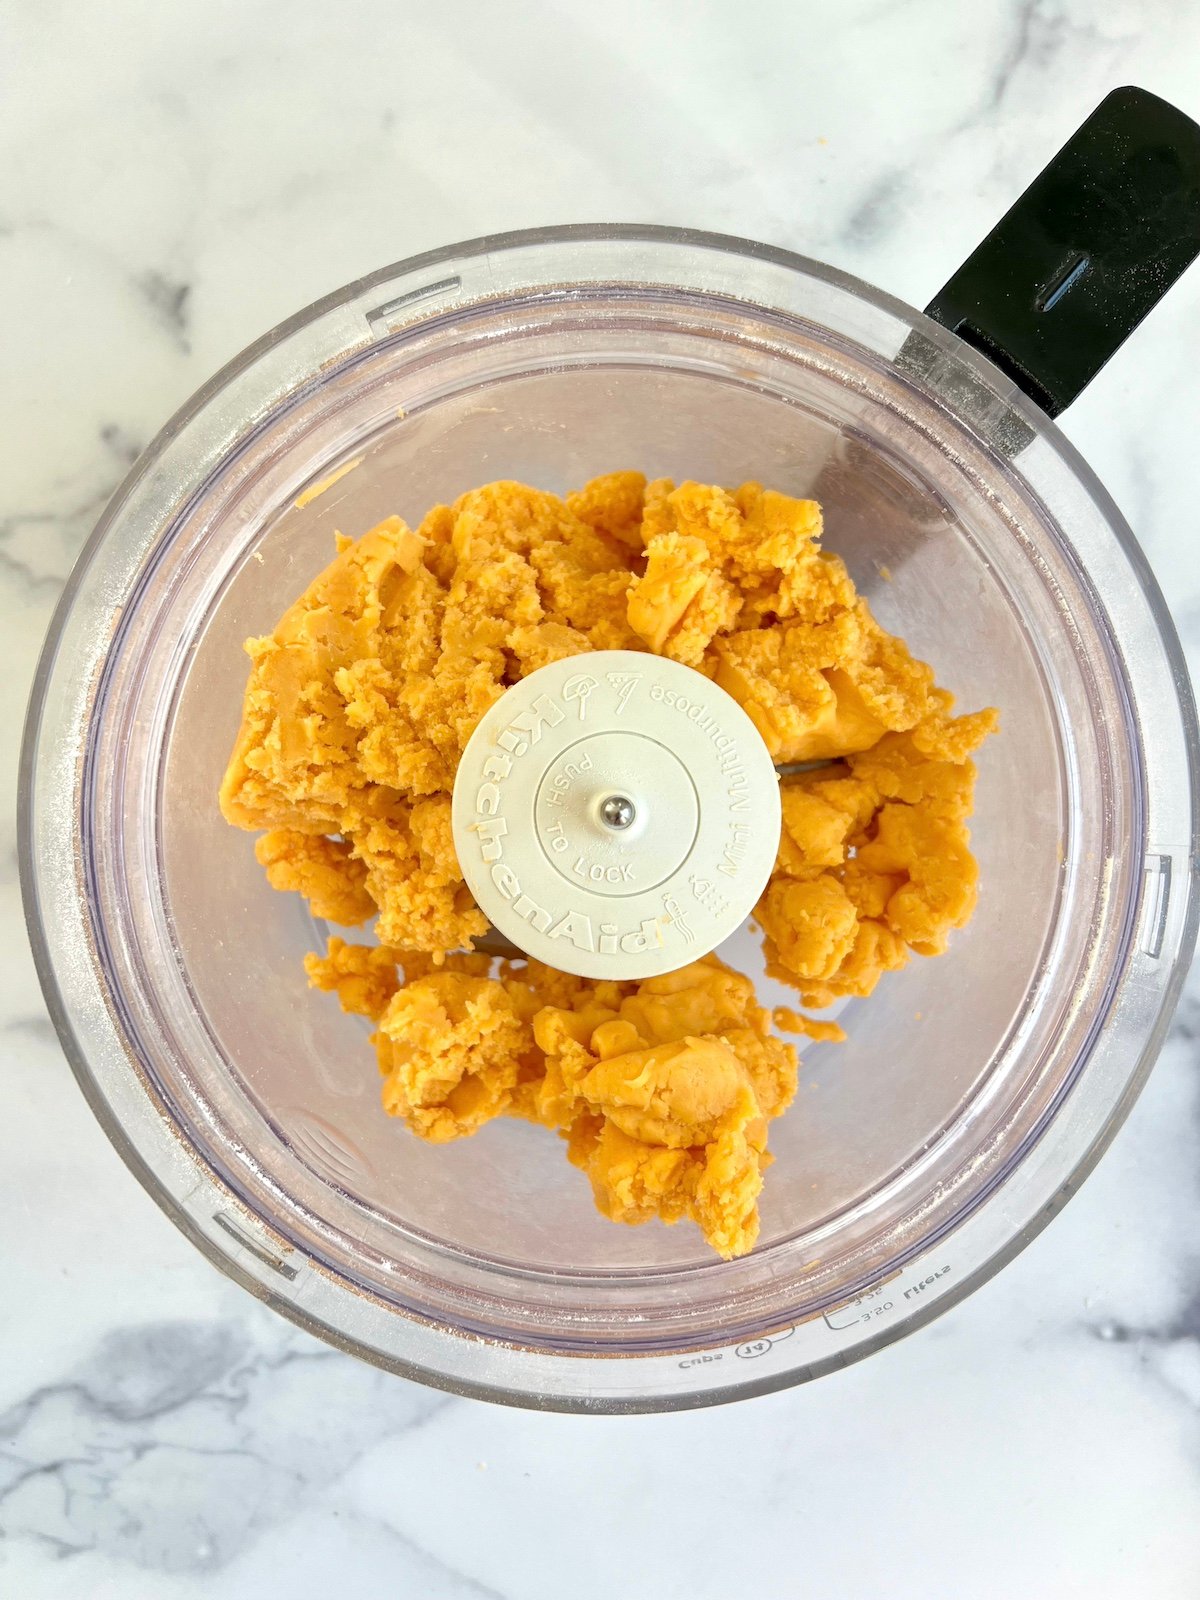
Step 2: Process until combined and crumbly.

Step 3: Press dough into a thick disc on parchment paper.

Step 4: Wrap dough in parchment and place in the fridge.
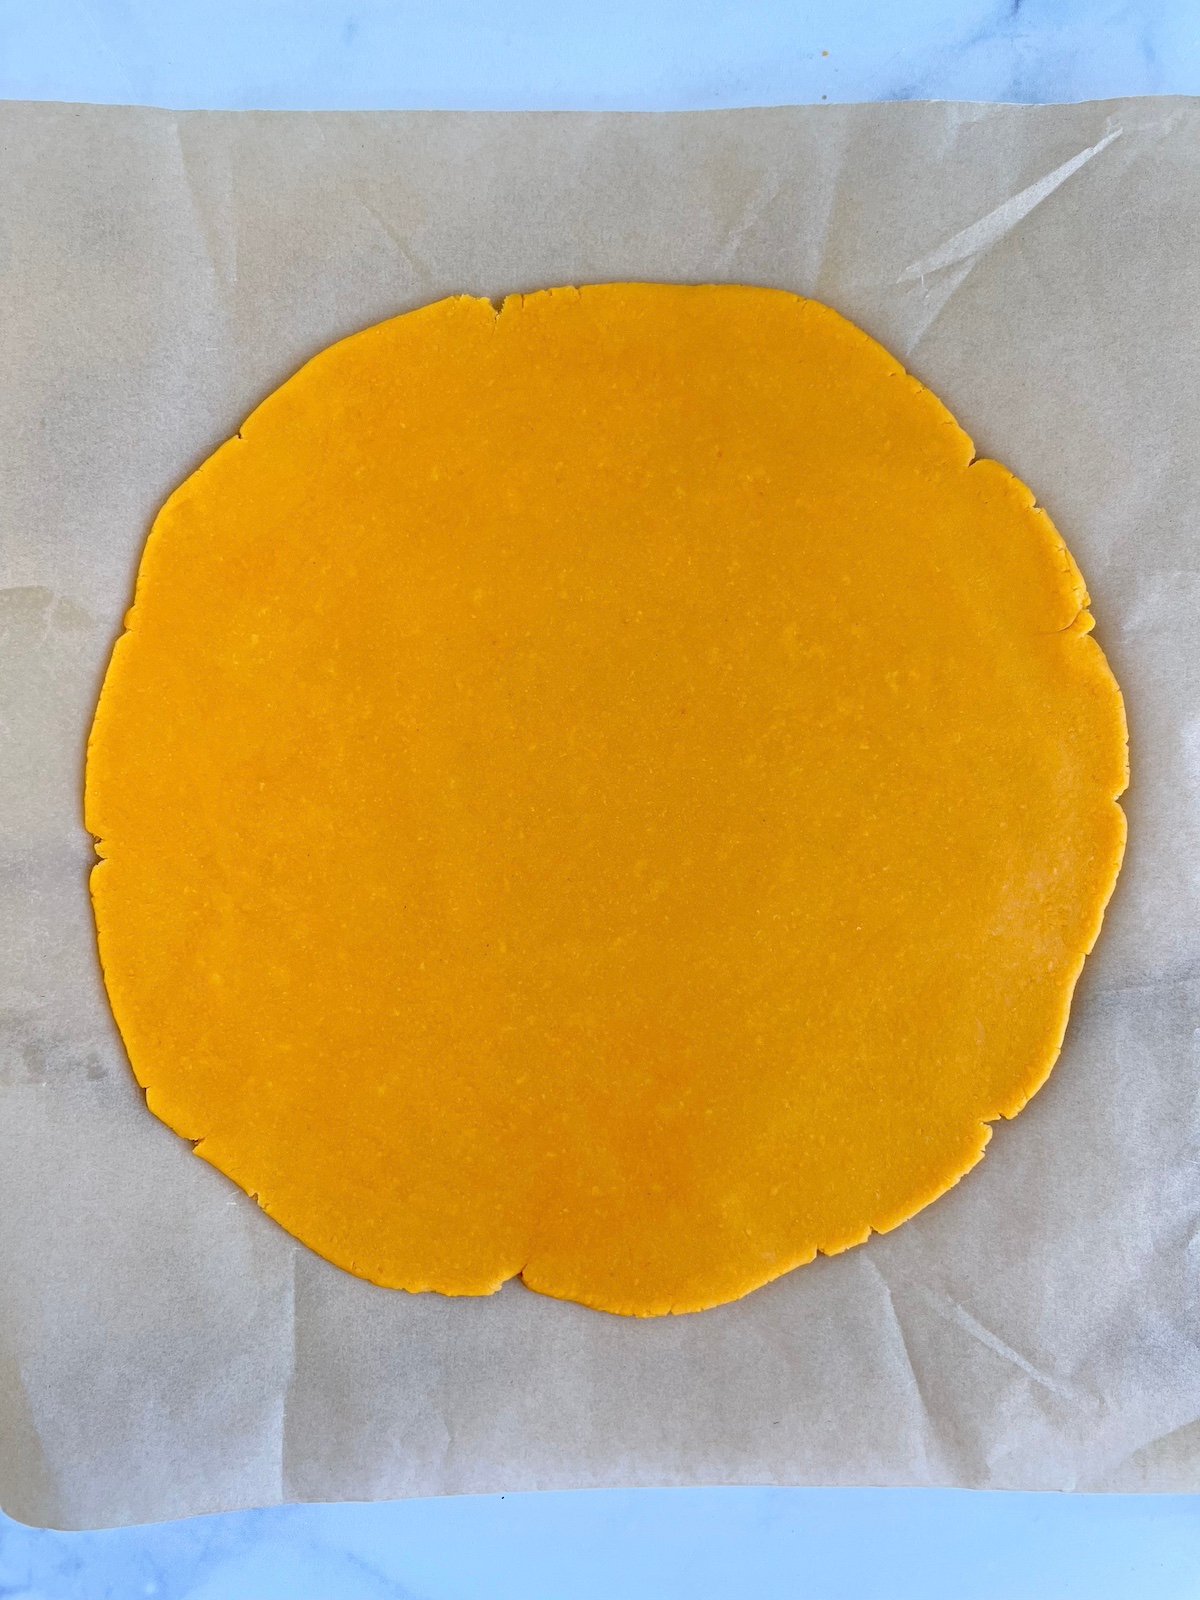
Step 5: After chilling, roll dough out to 1/4-inch thick.

Step 6: Cut out desired shapes from dough.
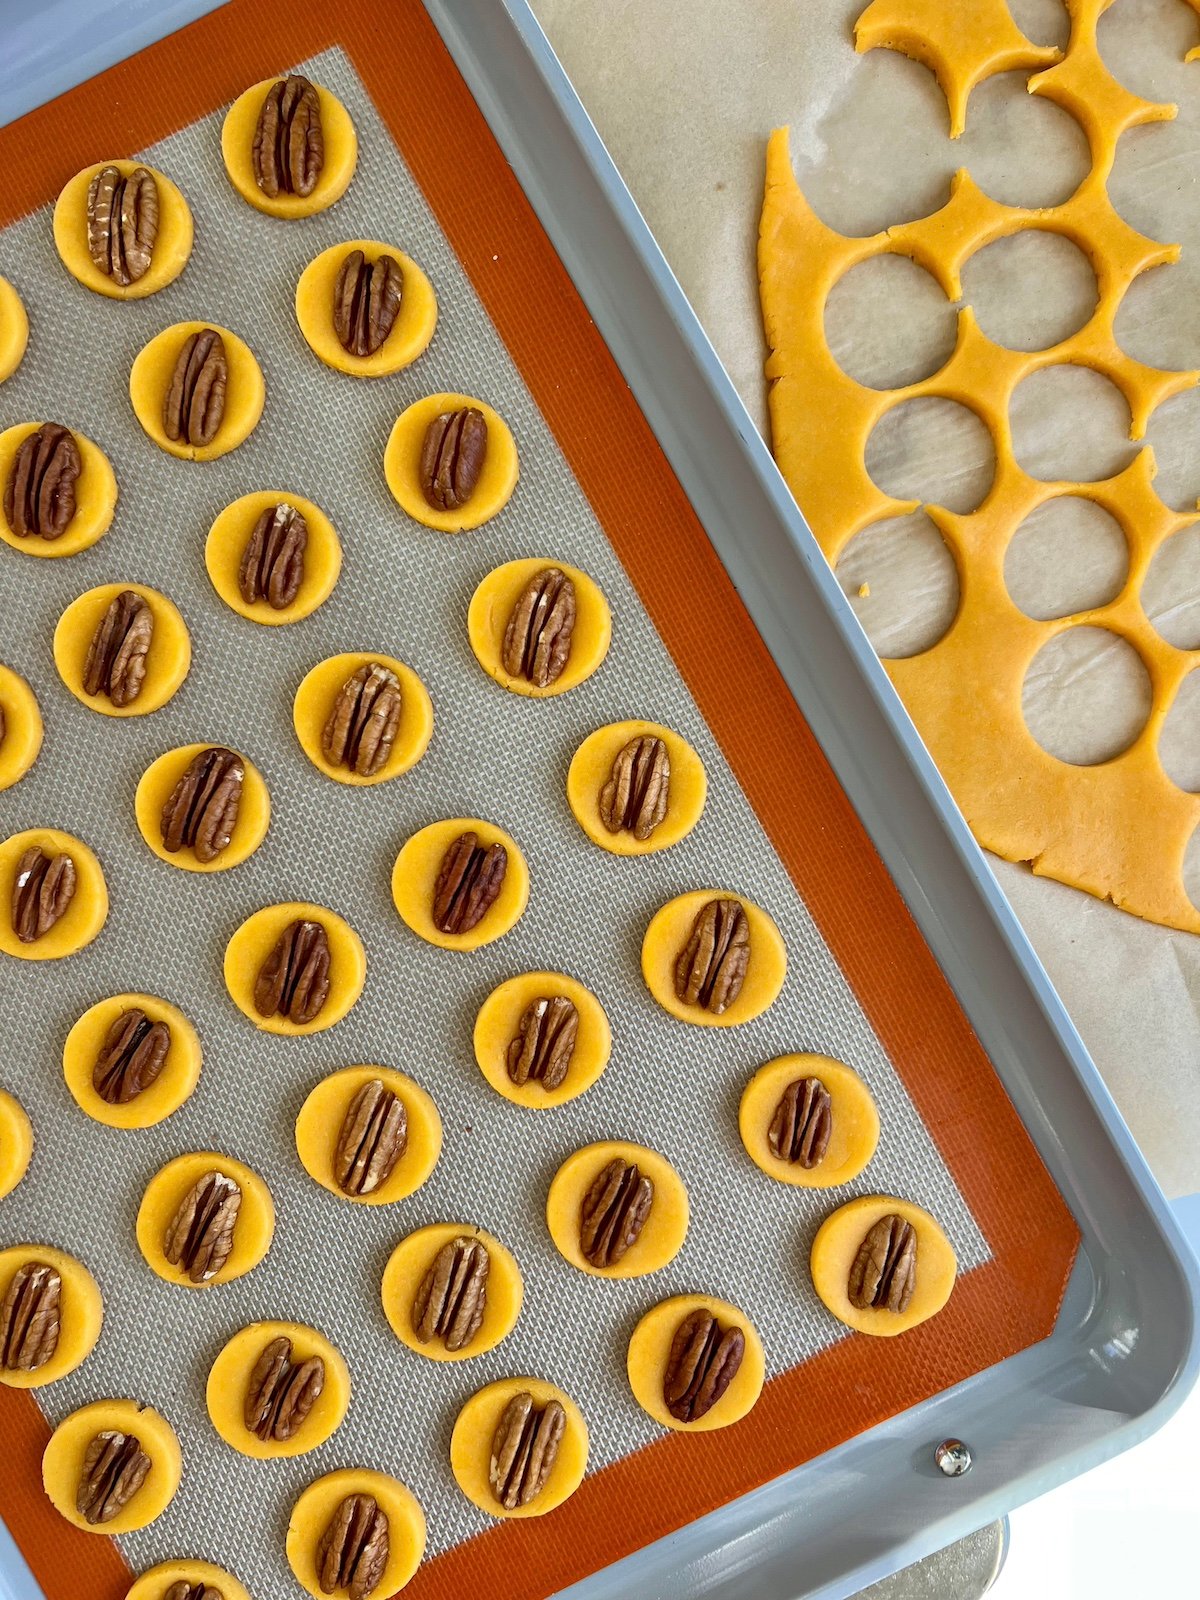
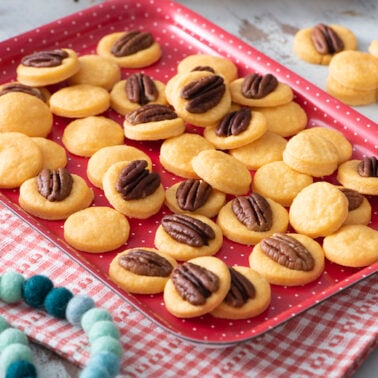
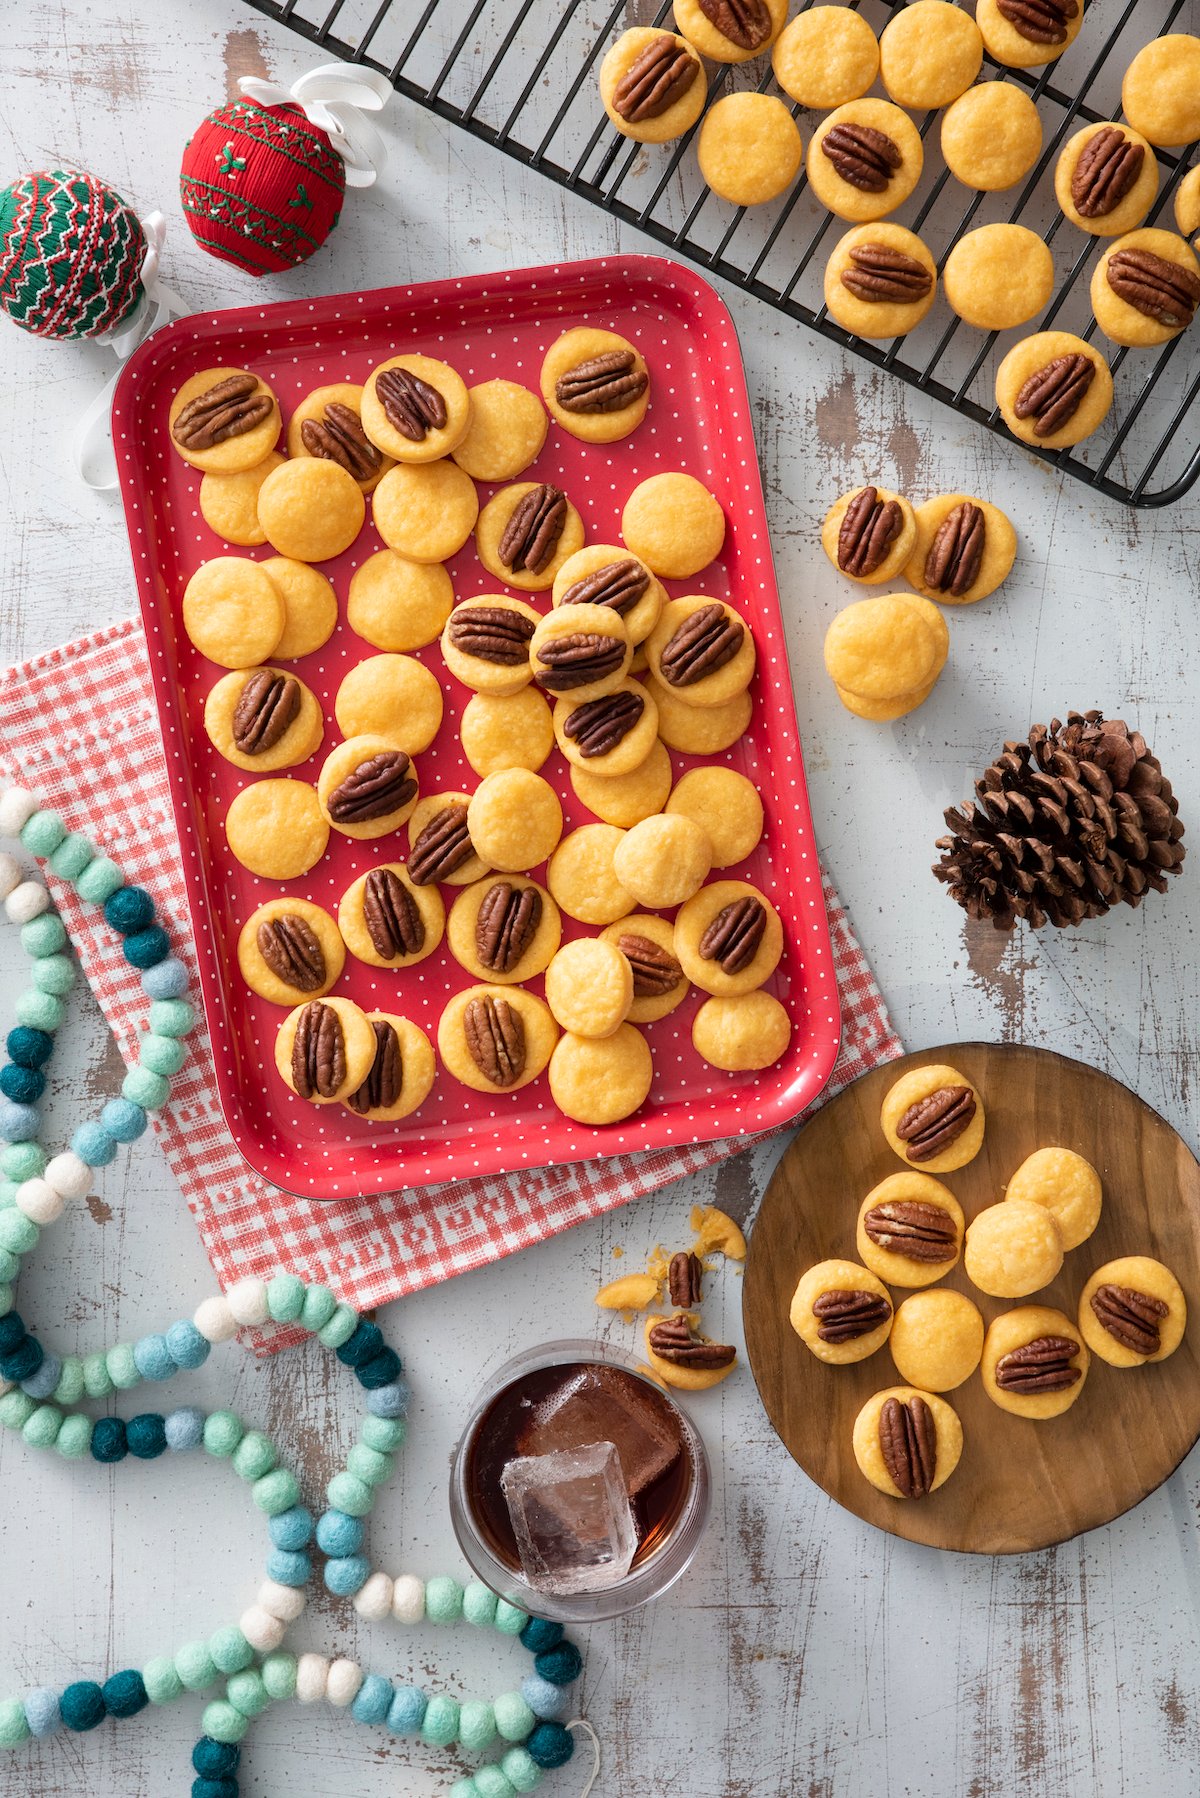
Step 7: Set wafers on a lined cookie sheet. Add nuts if desired.
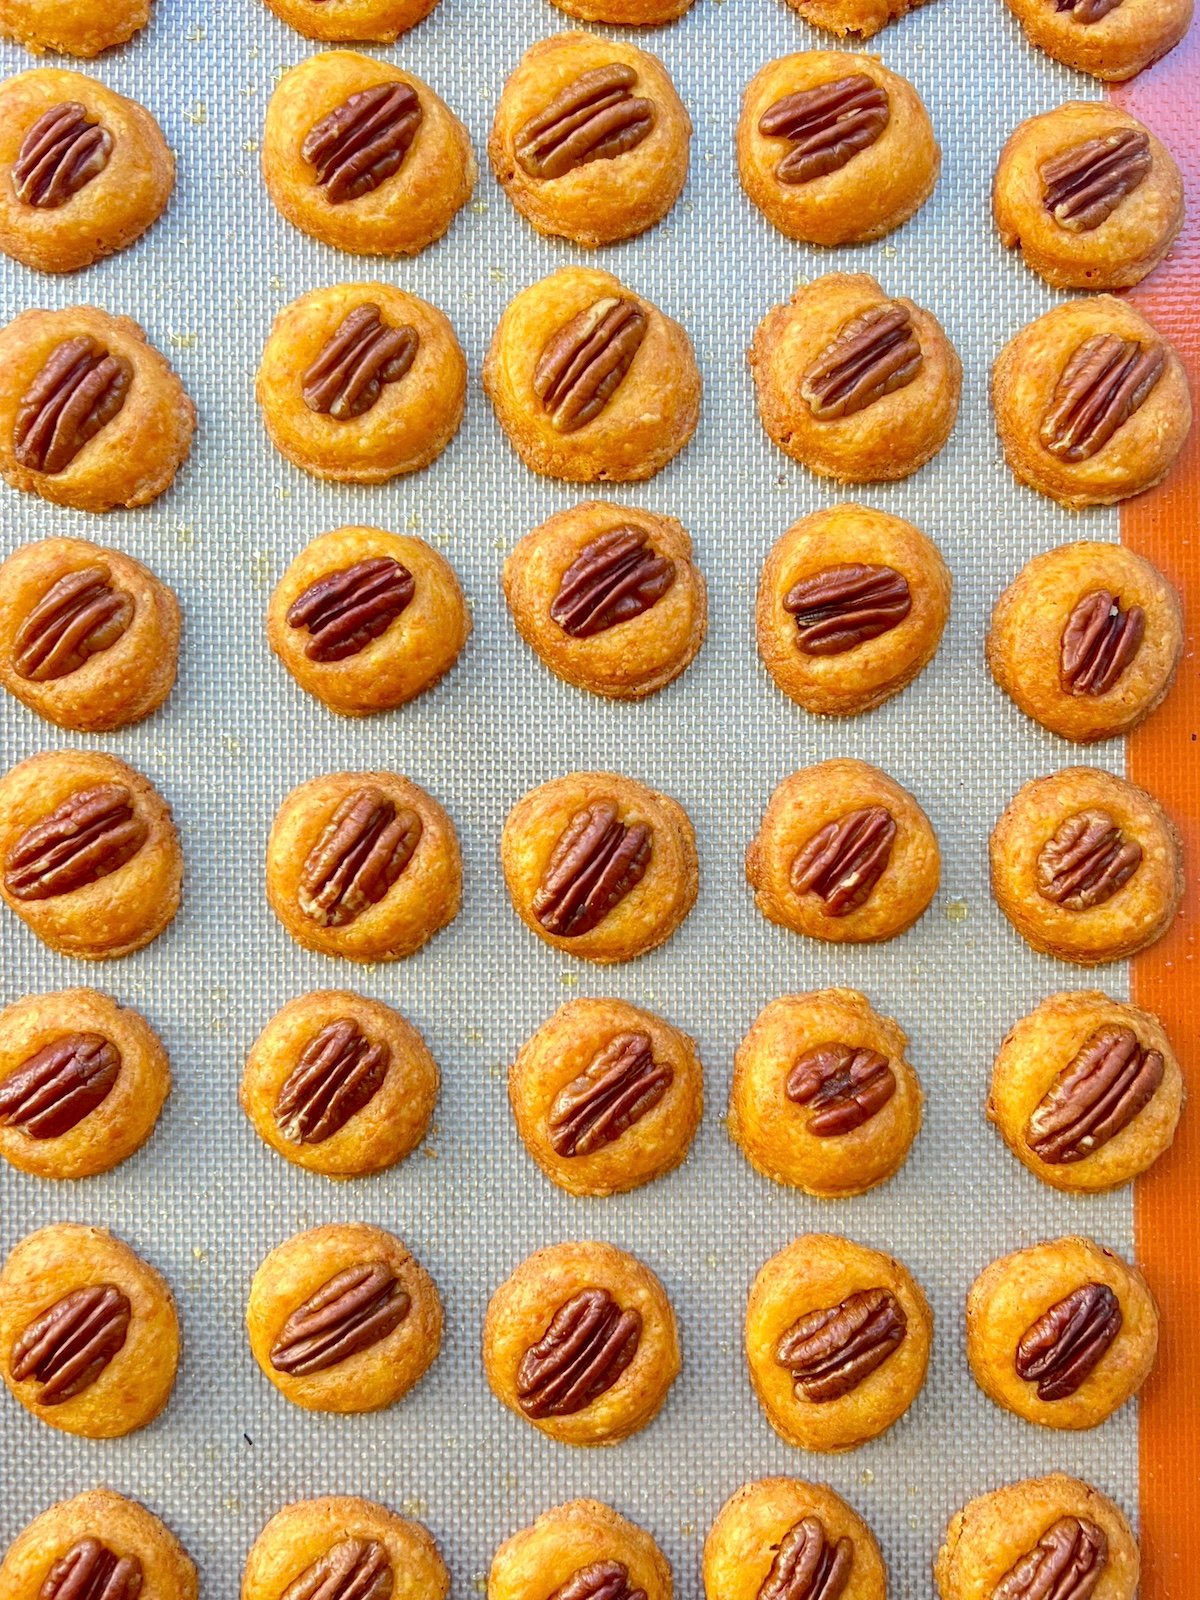
Step 8: Bake until puffed and golden on the edges.
Recipe Video
Tips and Tricks
- Make in Bulk: Want to make a bunch at once? The food processor will make quick work of shredding piles of cheese. And then you can make the wafers and only dirty the machine once!
- Cut it Out: No need for special cutters. You can use cookie cutters if you have them, but you can also use a shot glass or other small kitchen item.
- Always Shred Your Own: The key here is for the cheese to melt nicely with the butter and flour. This can only happen with freshly shredded cheese as the bags of pre shredded are coated with anti-caking agents that prevent smooth melting.
Would you like to save this?
FAQs
Allow your Cheese Wafers to cool completely after baking. Store the cooled wafers in an airtight container at room temperature for up to one week. This ensures they maintain their delightful crispiness and flavor.
As above, they can be enjoyed for a week on the counter. But for longer term storage, you can freeze them! If you want to freeze a large batch, flash freeze the wafers on a baking sheet first. Lay them in a single layer, ensuring they don’t touch. Once frozen, transfer the wafers to a freezer bag. Removing excess air from the bag helps prevent freezer burn. Label the bag and freeze for up to two months.
Whether you store on the counter or in the freezer, you can serve them as-is. When fresh and cooled they have a nice crispy crunch. Through the week they will lose a bit of it, but not too much. The freezing and thawing process will remove some of that delightful texture, but once thawed, feel free to pop them in the oven for a few minutes to return them to their original texture.
More Cheesy Recipes to Enjoy


Whether you’re on the hunt for a tasty homemade gift or a new family favorite, these Cheese Wafers are your golden ticket. Just a word of warning: once you start, you might find yourself hiding a stash for yourself! I’d love to know what you think of this recipe – leave a comment and rating below!
Want more Weelicious? Subscribe to my newsletter and follow me on Instagram, Facebook, and TikTok for all the newest recipes!

Cheese Wafers
Equipment
- Food Processor
Ingredients
- 1/2 pound sharp cheddar cheese, grated (about 2 cups)
- 5 tablespoons chilled butter, cut into cubes
- 1 cup all purpose flour, plus additional for sprinkling
- raw pecan halves, or other nut of preference (optional)
Instructions
- Add the cheese, flour and butter to a food processor and combine (dough may be a bit crumbly, but it will stick together).
- Remove all the dough to a piece of parchment or waxed paper and shape into a thick flat circle. Cover with waxed paper and refrigerate for one hour or overnight.
- Preheat oven to 400°F.
- Open waxed paper and roll out dough on it into a 1/4 inch-thick piece.
- Take small cookie cutters and cut out into shapes (you could also take an empty plastic medicine bottle to make circle shaped crackers. Just make sure you clean out the bottle thoroughly first.).
- Place on a cookie sheet (preferably lined with a silpat or parchment paper). Add pecans or other nut on top (if preferred) and bake for 12-15 minutes. Let cool on sheet for 2 minutes before removing.
- Serve.
Notes
- Storage: Allow your Cheese Wafers to cool completely after baking. Store the cooled wafers in an airtight container at room temperature for up to one week. This ensures they maintain their delightful crispiness and flavor.
- Freezing: If you want to freeze a large batch, flash freeze the wafers on a baking sheet first. Lay them in a single layer, ensuring they don’t touch. Once frozen, transfer the wafers to a freezer bag. Removing excess air from the bag helps prevent freezer burn. Label the bag and freeze for up to two months.
- Thawing: When ready to enjoy, let the wafers thaw at room temperature for about 20-30 minutes. For a crispier texture, you can reheat them in the oven for a few minutes.
- Nutty Choices: Not a fan of pecans? Swap them for your favorite nut or skip them entirely for a nut-free version—easy peasy!
- Gluten-Free? No Problem! Just use your go-to gluten-free flour, and you’ll still have those irresistible, cheesy wafers everyone can enjoy.
- Cheesy Fun: Try mixing things up with different cheeses like pepper jack or colby jack. It’s a simple way to give these wafers your own delicious twist.


THESE ARE AWESOME!
I used “mexican” shredded cheese because it was what I had and they turned out delicious! I had a little bit of trouble rolling out the dough because when I took it out of the fridge it was hard as a rock but I just broke off little pieces, rolled them, smooshed them and used flower shaped cookie cutters. My house smelled great while they baked! My daughter keeps asking for crackers!
Mine turned out a little crumbly/breadlike…but they were great!!! Cant wait to try them on my 2 1/2 year old!!!!!!
My family loves these & everywhere I take them I get asked for the recipe. I roll mine out on a Silpat and it makes the crumbly dough easier to work with. (To the mom whose wafers turned out bready, make sure you chill the dough at least an hour. If you don’t, they’re really easy to roll out but they turn out puffy.)Thanks for the great recipe, Catherine!
I’m not a huge fan of cheese crackers, but my husband and twin boys are. Even I thought these were great! I will be making them again!
Have you ever tried to make these with a mixture of flours? Like, half white and half whole wheat? I’m thinking if it works, it could make for a healthier treat. Thoughts?
Since there’s no yeast and baking powder in them, they should be pretty crispy and flat. How did you make it? Sometimes when you over work the dough, it will lose it’s consistency when you bake it. You make have over worked it in the food processor.
I made these last night and they were delicious! (I think I may have eaten the majority of them…)
I was wondering what the texture was supposed to be like on these? I used cold block sharp cheddar and cold butter and they were more bread like than cracker like. Is this right?
Half a pound = 8 oz.
hi there, thinking to make this cheese wafers today, but not sure how much is 1/2 lb of cheese in grams or ounces?
can you help
thanks
They will last about 4 days, if no one eats it all up…its best refrigerated. Frozen would last about 4 months.
How long will these keep, either in an air-tight container or frozed?
I made these wafers for my son and he loved them! I have one question though, are they supposed to turn out soft like a cookie or crispy like a cracker? My son loves them regardless but I was just wondering because mine were softed and I think they would even be tastier if they stayed crispy like how they are when they come out of the oven. Thanks!
Thanks for this recipe. I have been looking for ideas for things I can make for my two little ones. We are really trying to eat less processed foods. I just found you and it looks like you have a lot of things that I will try.
Question…should the butter have been melted for the cheese wafers. My dough was exceptionally crumbly, even after refrigeration. Therefore, it did not roll out and no shapes held…they just crumbled. What did I do wrong???
These looks incredibly good! I know that my kids would love them. Easy enough to make, too!
They’re on my “to try” list! Thanks for sharing!